How to Edit Photos With AI: Change Outfits, Replace Backgrounds, and Create Campaign Images
AI photo editing can take an existing image in a new direction. You might try a different outfit, replace a background, remove a distracting object, or create a campaign visual from a product photo.
Start with a clear source image and one specific goal. Describe what should change, identify the details that must stay, then compare the result with the original. This guide covers common editing tasks and what to inspect before using an image.
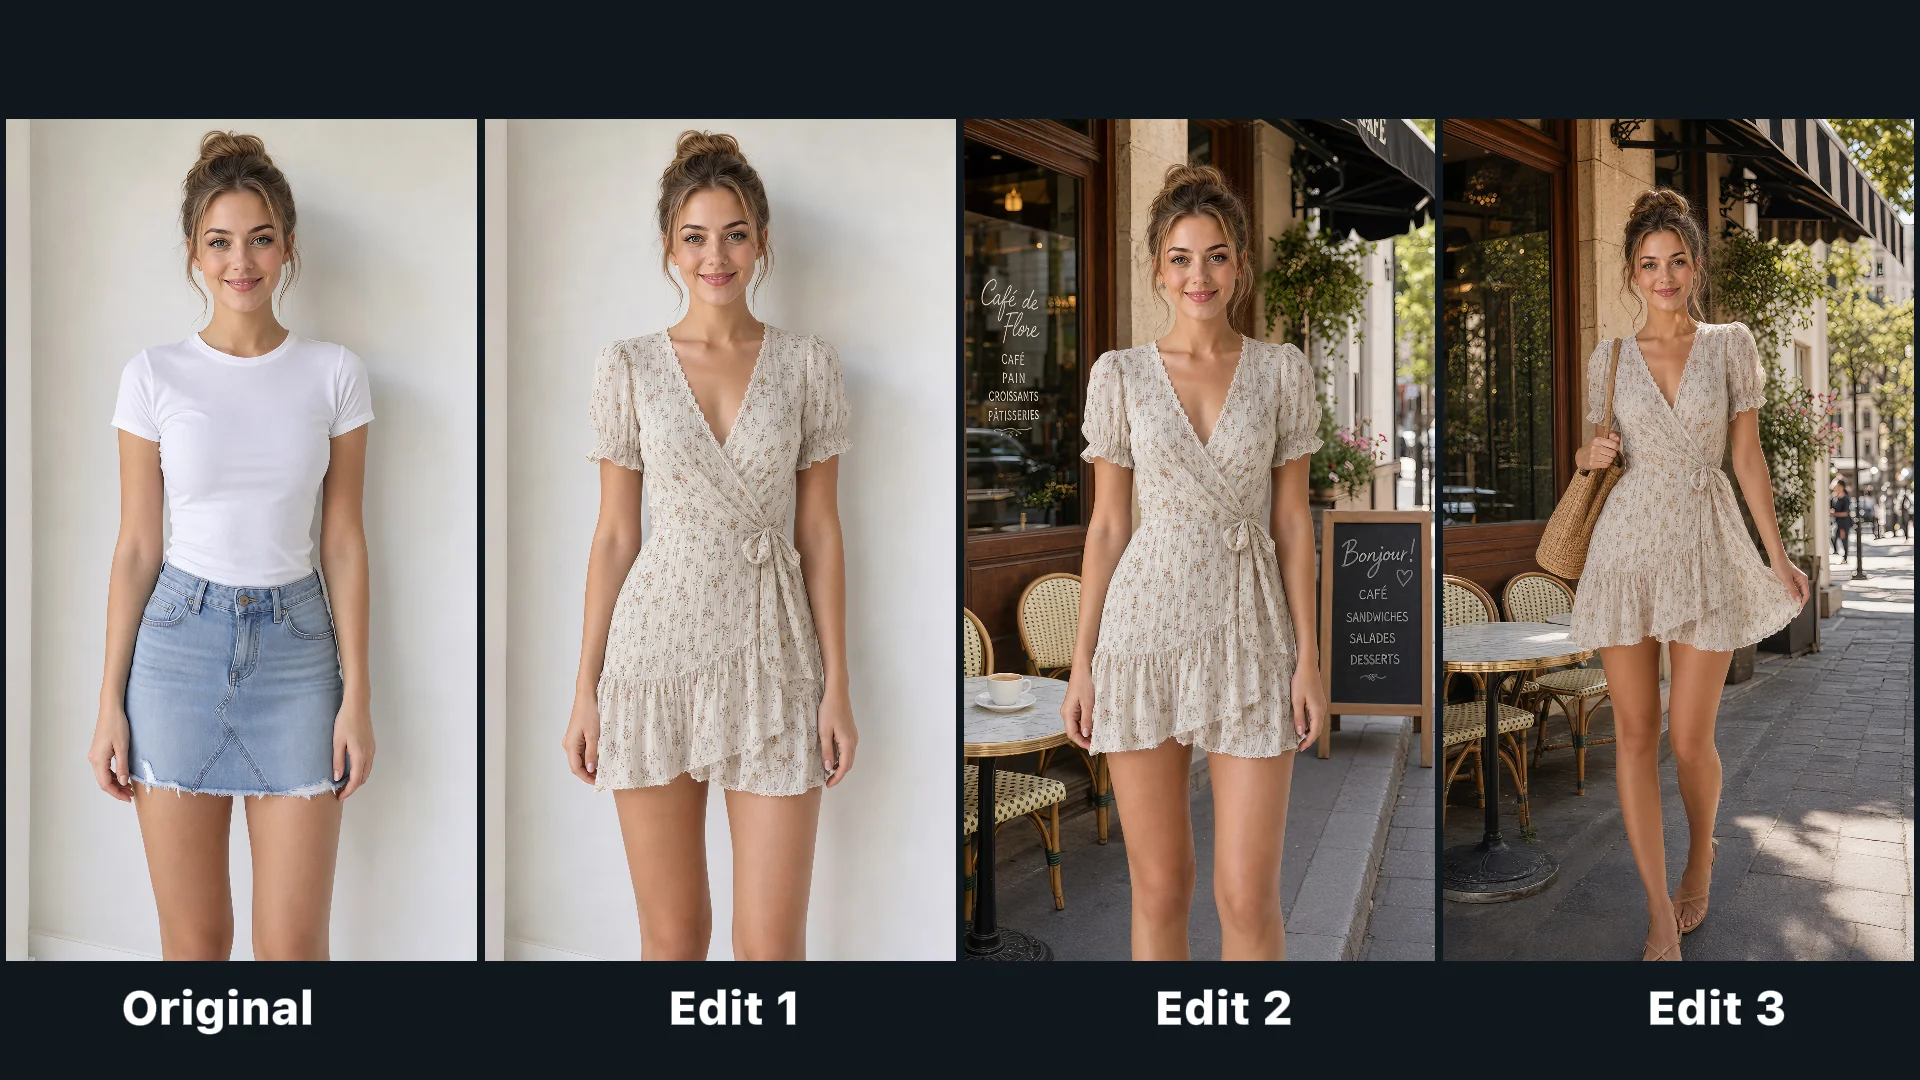
What Can You Change in a Photo With AI?
An AI editor uses an existing image as a starting point and follows an instruction to generate an edited version. The result depends on the source image, the instruction, and the editor. A focused request makes it easier to assess whether the intended change worked.
Change an outfit while keeping the portrait
An outfit edit can help explore a styling or campaign direction. Name the garment and color, then say which portrait details should remain unchanged.
Example prompt
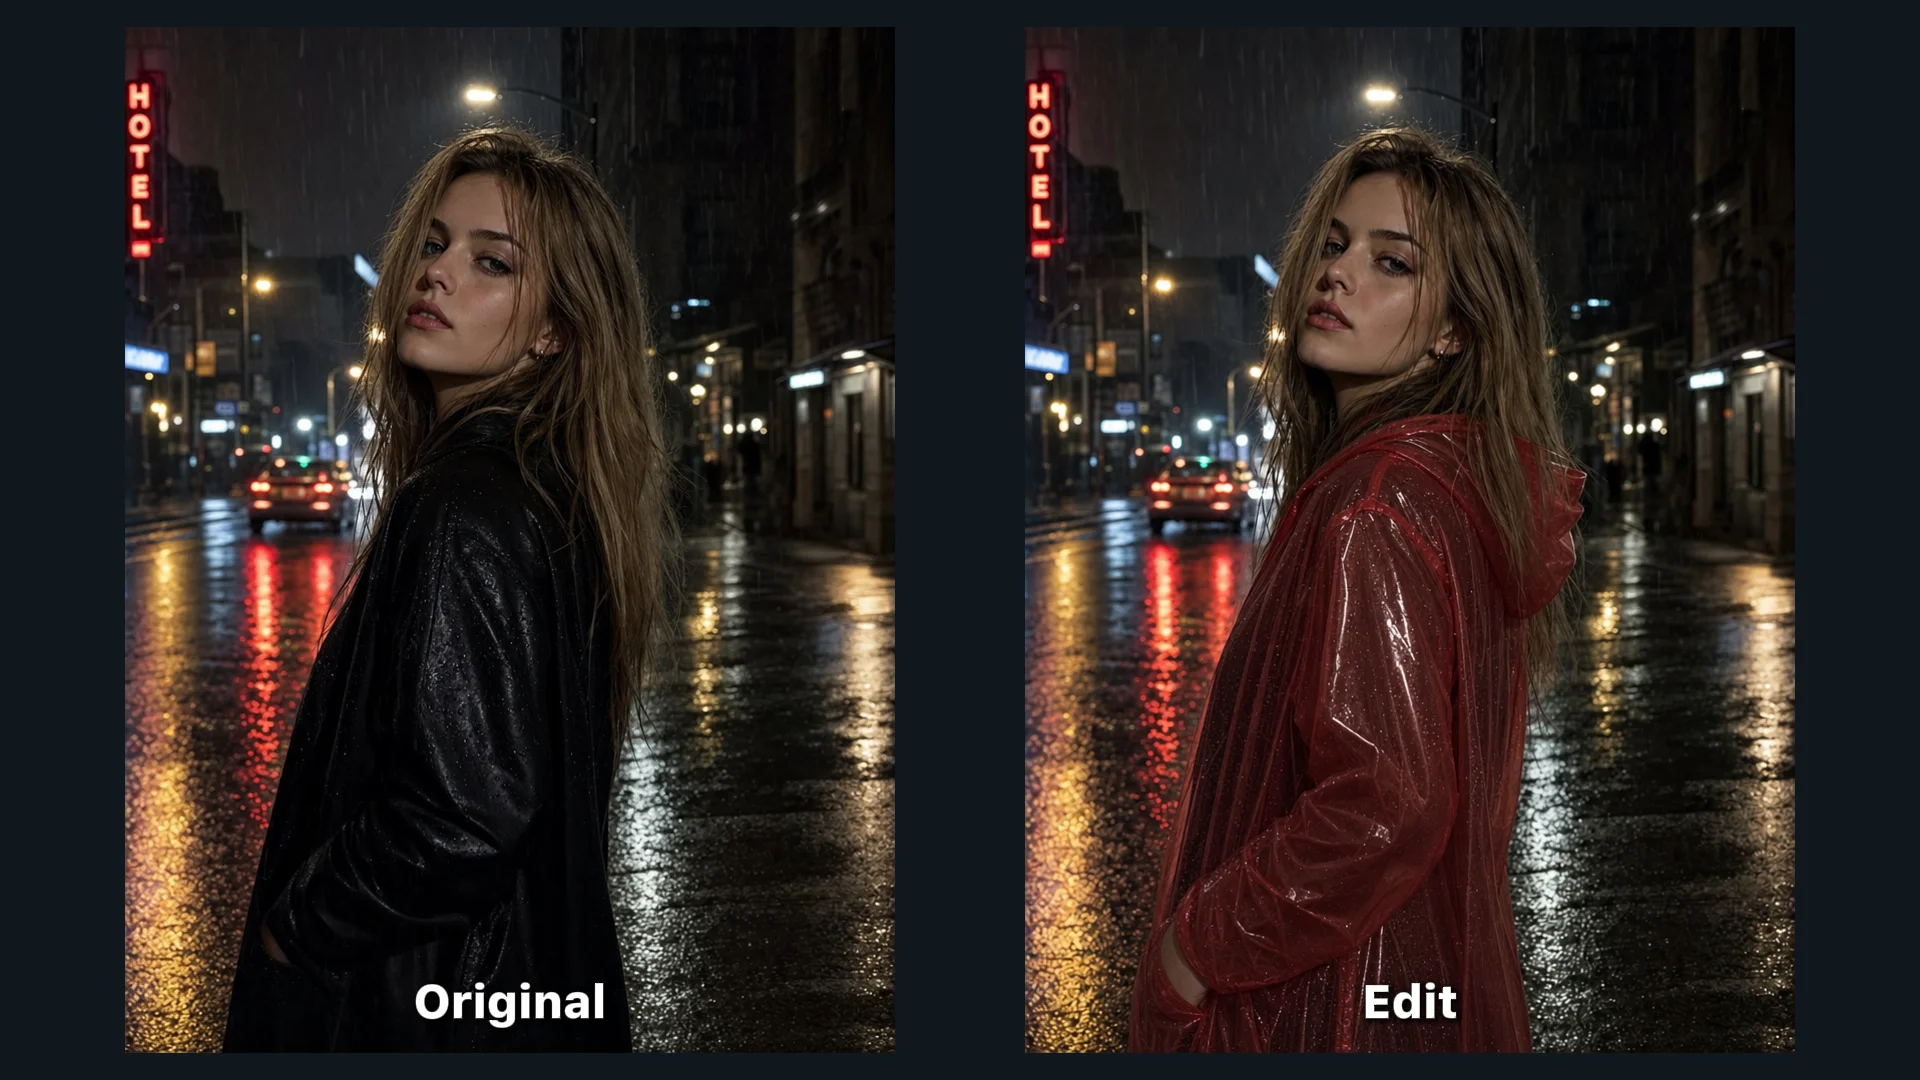
Change the person's black jacket to a bright red raincoat with a hood. Keep their face, hairstyle, pose, hands, and the city background unchanged. Match the existing lighting.
Inspect the garment around the neck, wrists, and hair. Check the fit, buttons, patterns, and seams, since these details can shift during generation.
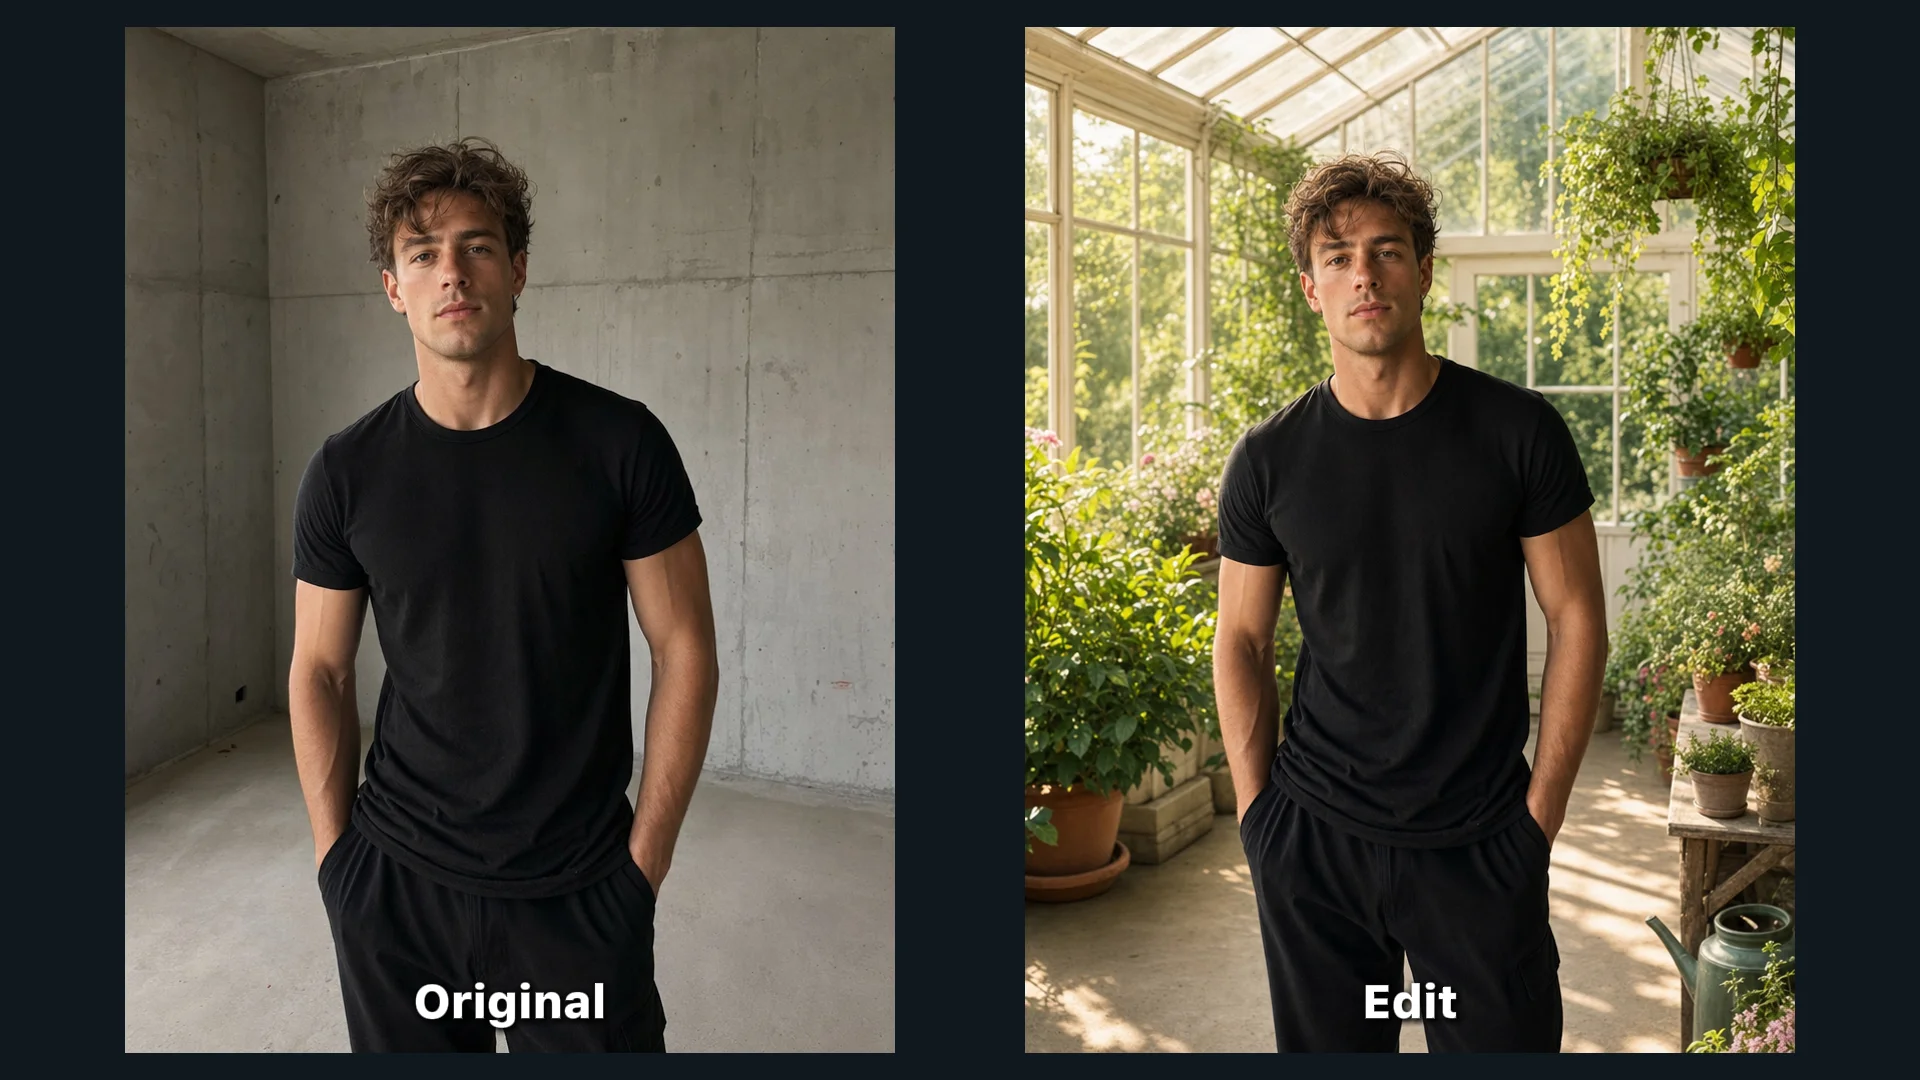
Replace the background
A new setting can change the mood or intended use of a portrait or product image. Describe the setting and lighting, then specify what should stay intact.
Example prompt
Replace the gray wall with a bright greenhouse filled with soft morning light. Keep the person, outfit, expression, and framing unchanged. Add natural shadows that fit the new setting.
Check the outline around hair and other fine edges. Make sure the light direction and shadows fit the new scene.
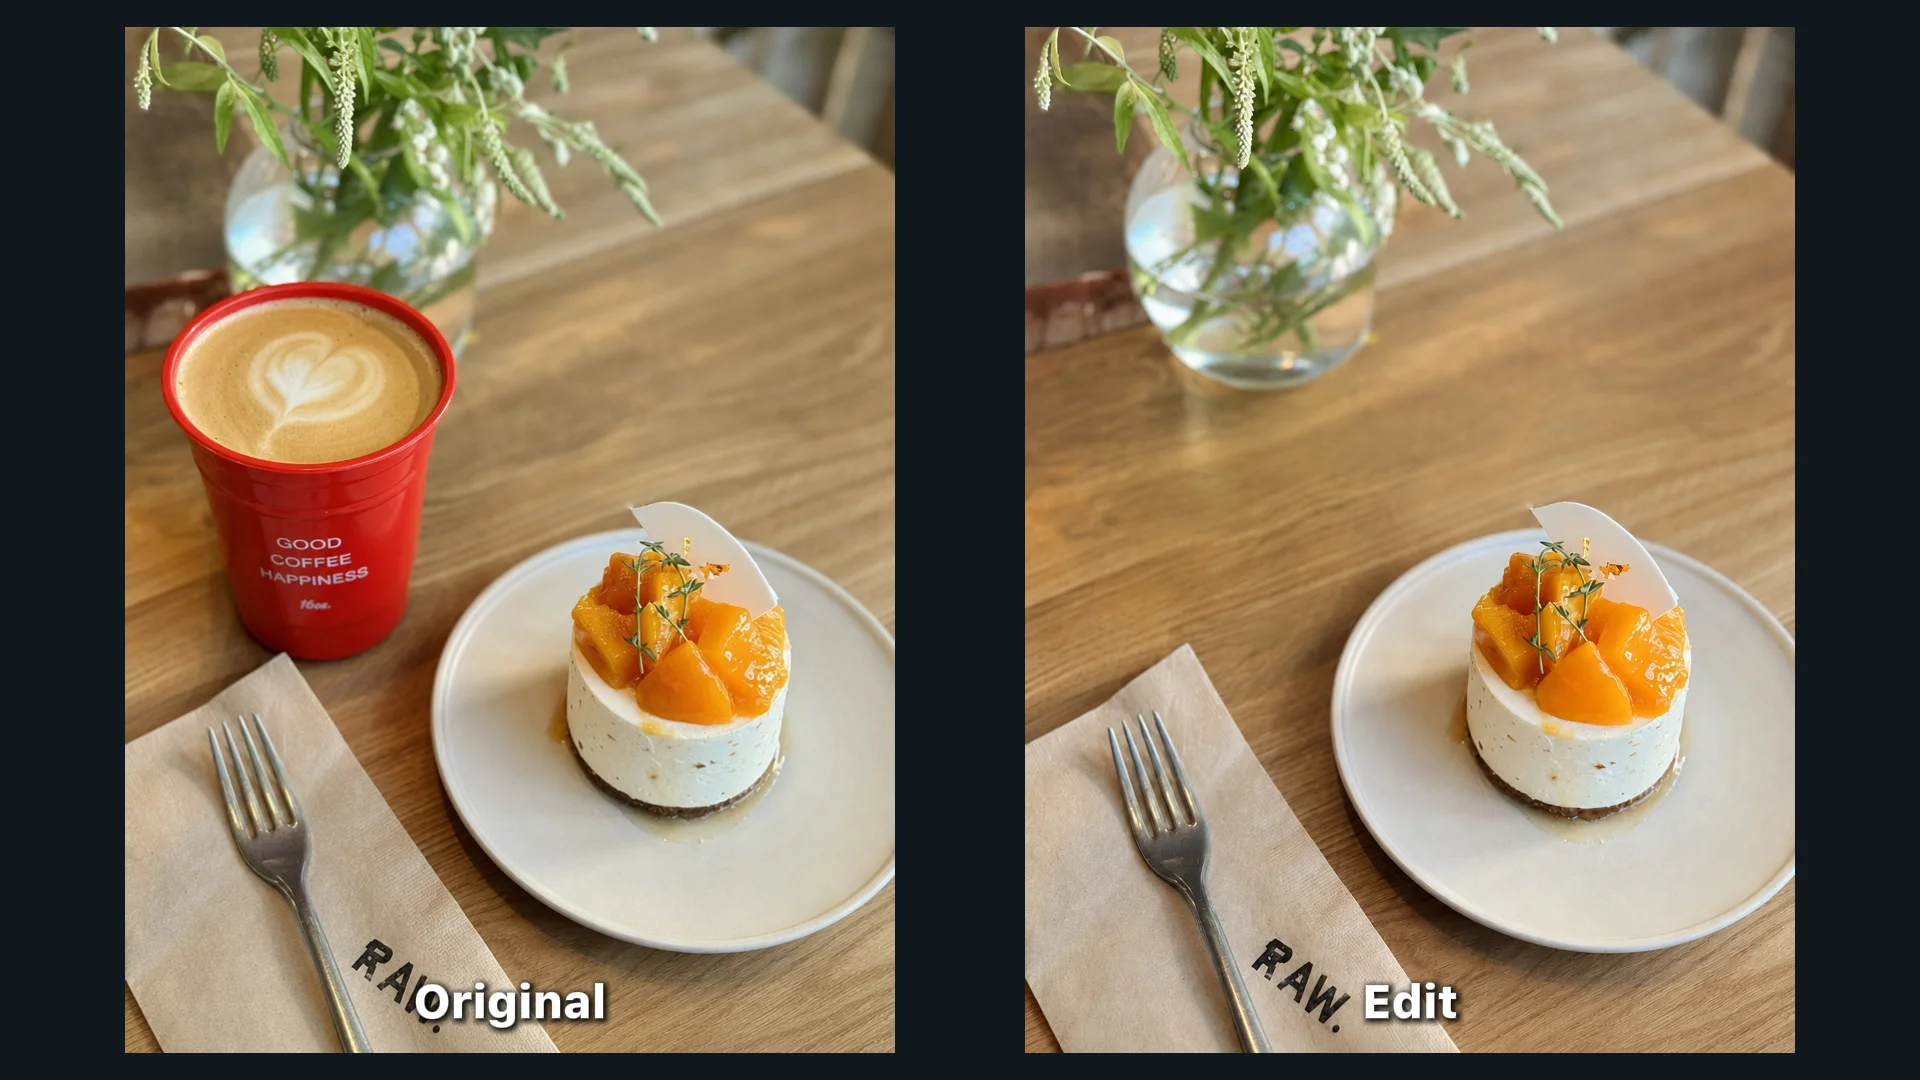
Remove or replace a distracting object
Ask for one clear removal or replacement, and describe what should appear in the empty area.
Example prompt
Remove the red plastic cup from the table. Recreate the wood grain underneath it and keep the plate, food, table edge, and camera angle unchanged.
Inspect the reconstructed area for repeated textures, blur, or mismatched shadows. If the object covered important details, the editor has to invent what was behind it.
Create a product image for an ad
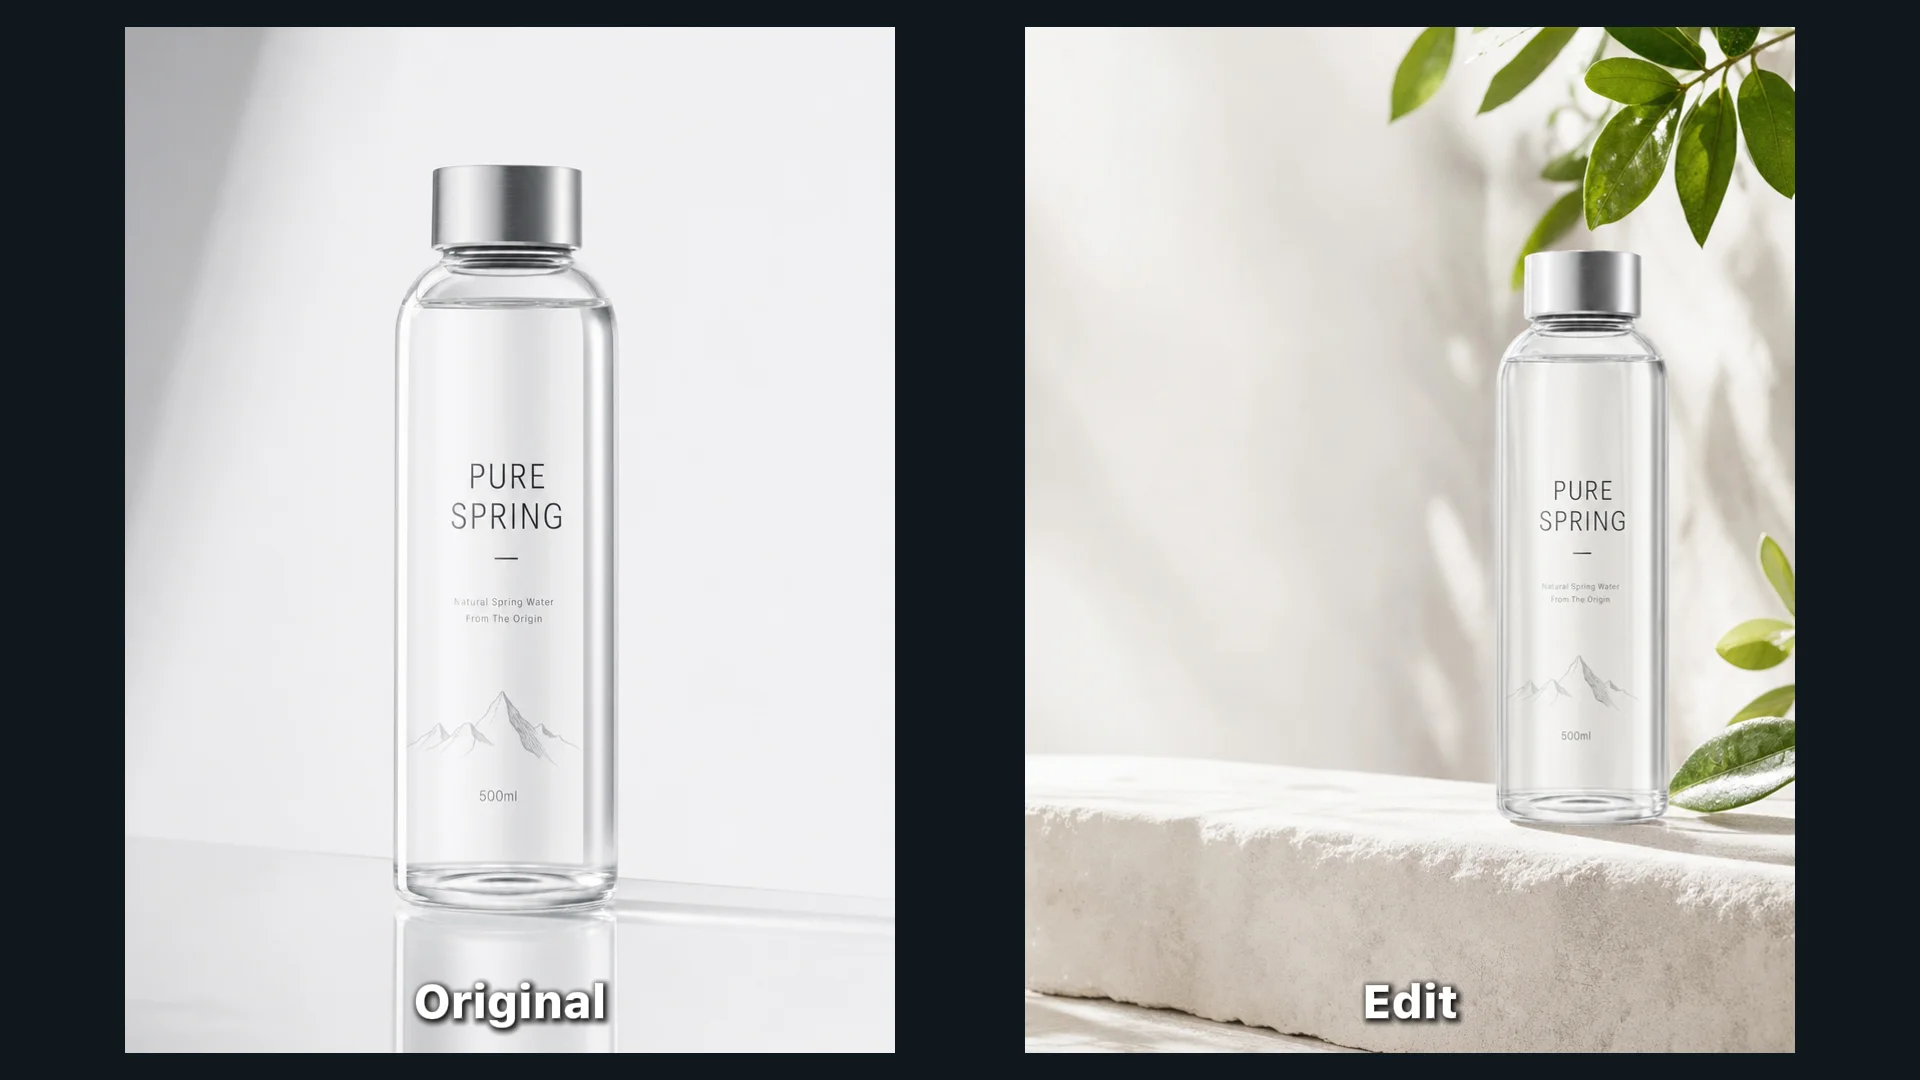
A product photo can be used to explore campaign settings and compositions. Describe the scene, lighting, mood, and space for copy. Explicitly name the product details that must remain consistent.
Example prompt
Create a clean summer campaign image using this bottle as the product reference. Place it on a pale stone surface with soft sunlight and a few citrus leaves. Keep the bottle shape, cap, label layout, and label colors unchanged. Leave open space on the left for ad copy.
Compare the result with the original at full size. Check the product shape, proportions, colors, logo, and label. Generated lettering may look plausible but still be inaccurate, so verify packaging before using the image commercially.
Adapt a photo for a poster or social post
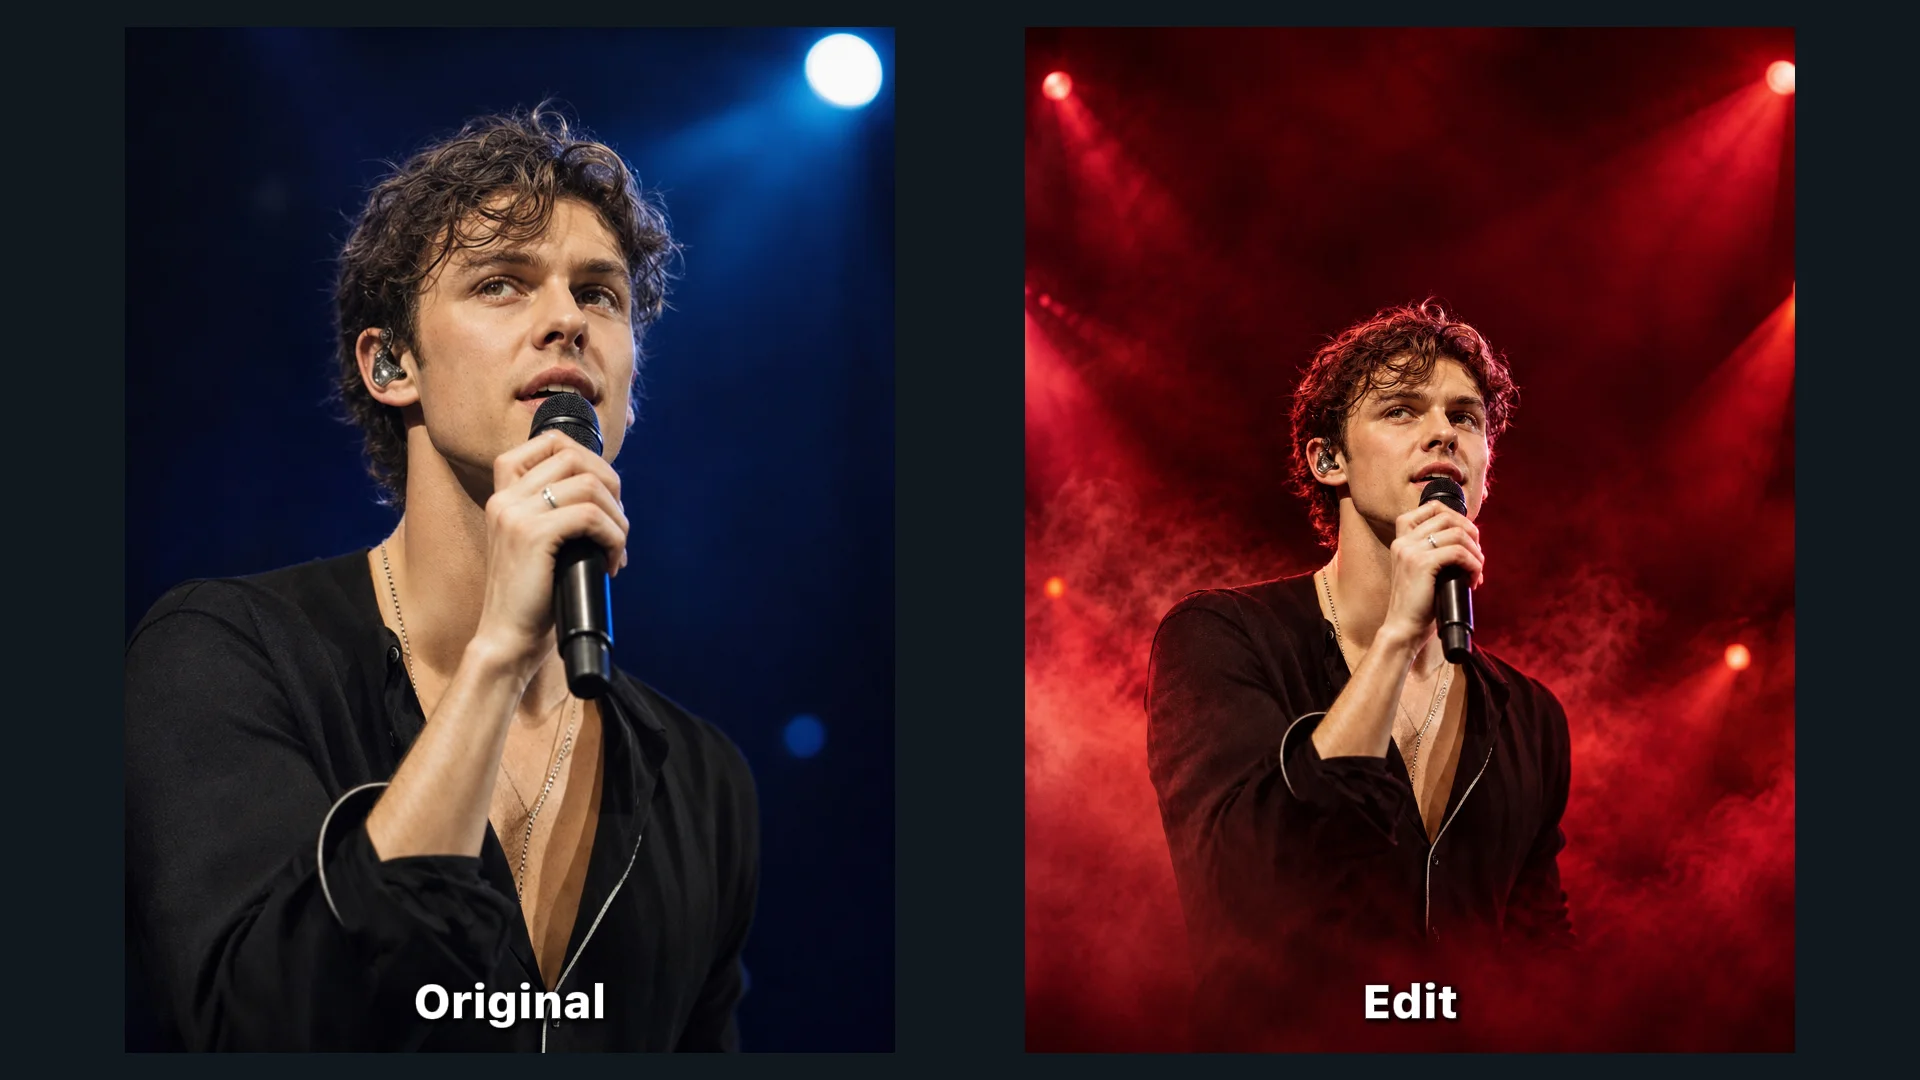
Plan the composition around the message. Ask for clear negative space where a headline or event details will go, then add exact copy and logos in a design editor.
Example prompt
Turn this concert portrait into a dramatic event-poster background. Use deep red stage lighting and subtle haze. Keep the singer's face and microphone recognizable. Leave clear space across the top for a title and along the bottom for event details. Do not add text or logos.
For multiple variations, change one element at a time, such as the background, palette, or crop. This makes comparisons easier.
How to Edit a Photo With AI in VisWorld
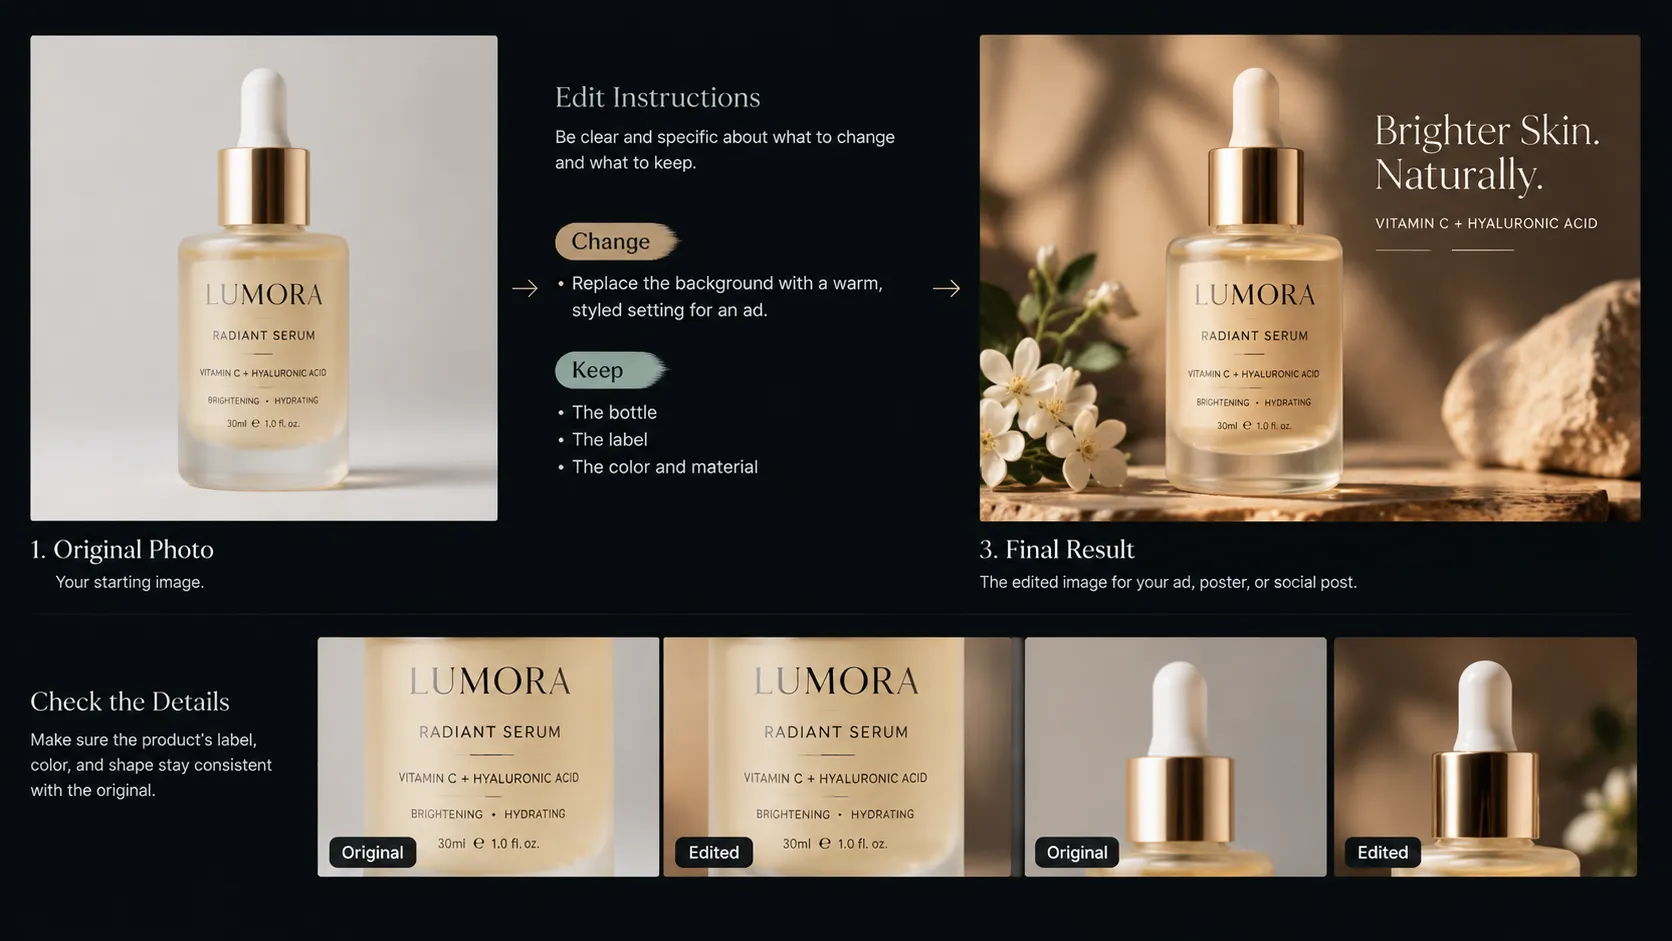
- Choose the photo and intended use. Decide whether the image is for an ad, product page, poster, or social post. The use affects the crop and the space the composition needs.
- Describe one edit. Replace a vague request such as “make it more stylish” with a specific change, such as “replace the plain wall with a warm-toned studio backdrop.”
- List what must stay. For a person, identify details such as face, hair, pose, and expression. For a product, specify shape, color, label, and material.
- Generate and compare. Place the result beside the original. Check the edited area and the details that were meant to remain unchanged.
- Refine one thing at a time. Keep the parts that worked and adjust only the part that needs another pass.
Choose the right edit for the job
| Goal | Include in the instruction | Check the result |
|---|---|---|
| Portrait outfit concept | Garment, color, and details to preserve | Face, hands, garment edges, and fit |
| New portrait background | Setting, lighting, mood, and framing | Hair edges, shadows, and light direction |
| Remove a distraction | Object to remove and what should appear behind it | Texture, repeated patterns, and blur |
| Product ad image | Scene, lighting, copy space, and product details to preserve | Logo, label, proportions, and color |
| Poster or social visual | Audience, mood, composition, and space for text | Crop, empty space, and unintended text |
Common AI photo-editing mistakes
Asking for too many changes at once
Changing the outfit, background, lighting, and style in one instruction makes unwanted results harder to diagnose. Start with the most important change and build from there.
Leaving preservation details unstated
The editor may reinterpret parts of the image you expected it to keep. Name important details explicitly, especially faces, product packaging, and distinctive objects.
Expecting exact text or logos
Image models can distort letters and brand marks. Treat generated text as a draft at most; add or correct exact typography in a design tool. Check packaging before commercial use.
Skipping the full-size comparison
An edit may look convincing as a thumbnail and reveal problems when enlarged. Compare faces, hands, edges, shadows, and reconstructed areas against the source.
Frequently asked questions
Can AI change clothes in a photo?
You can ask an AI editor to change clothing. Specify the garment and identify details to preserve, such as the person's face, pose, and background. Review the fit and edges before using the result.
Can I replace a photo background without changing the subject?
Describe the new setting and tell the editor to preserve the subject and framing. Then inspect the subject's outline, lighting, and shadows.
Can AI remove an object from a photo?
An editor can attempt to remove an object and reconstruct the area behind it. Results depend on what the object covers, so inspect the filled area for blur, repeated textures, or mismatched details.
Can I use AI-edited photos in ads or social media?
They can be used as campaign or social visuals when you have the necessary rights and the result meets your standards. Check product details and brand assets before publishing, and add exact text and logos yourself.
Start with the image you have
An existing photo can be a starting point for a new outfit, setting, cleaner scene, or campaign visual. Choose one outcome, describe what should change, and name the details that must remain. Compare the edited image with the original before sharing or publishing it.
Edit your image